7 December 1941: The Air Force Story
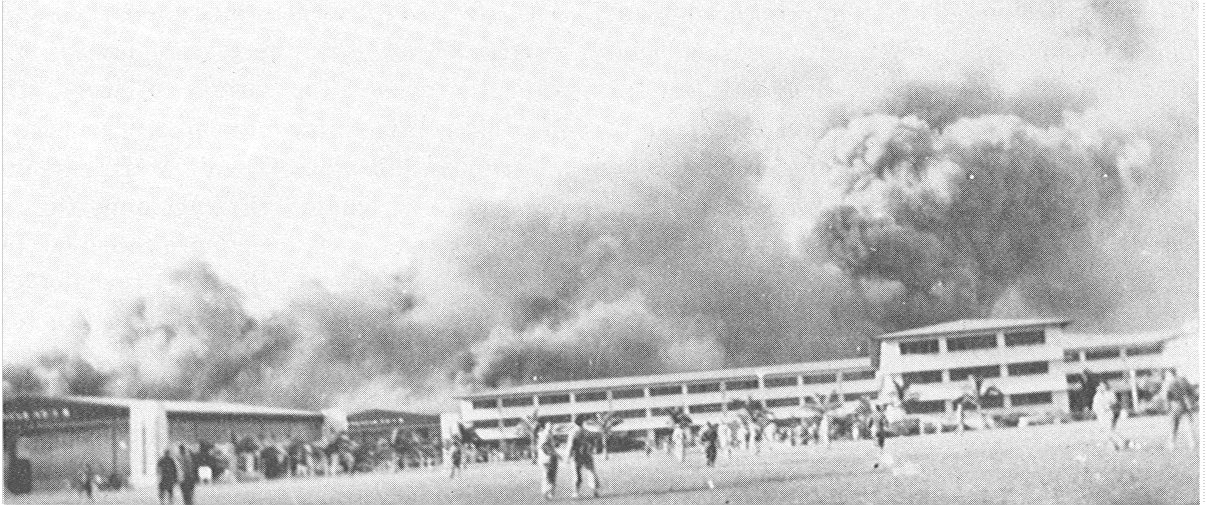
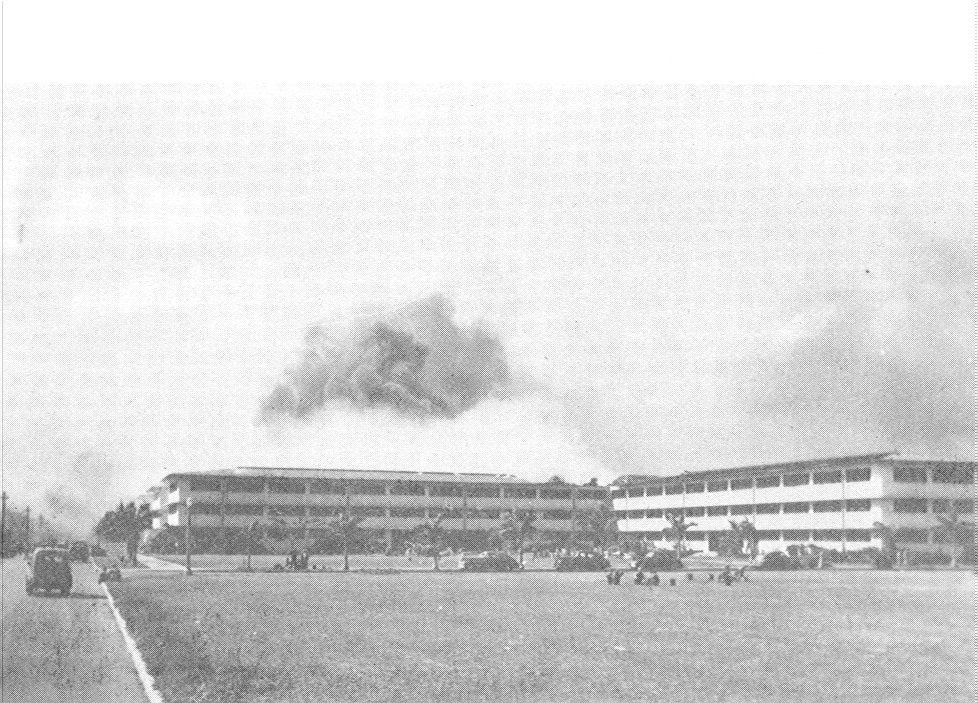
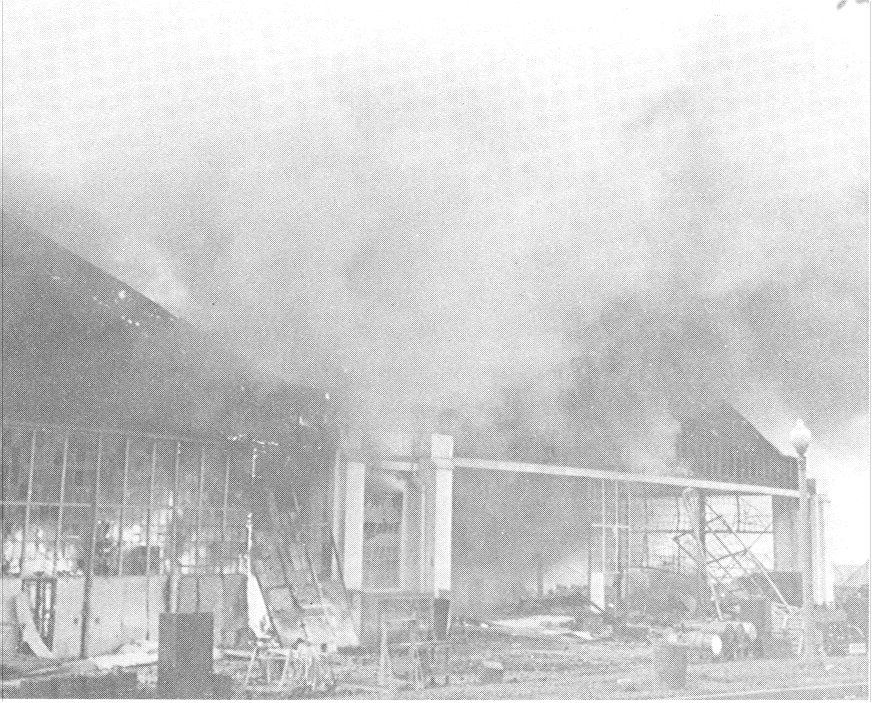
The first bombs to strike Hickam Field were dropped on Hawaiian Air Depot buildings and
the hangar line, causing thick clouds of smoke to billow upward.
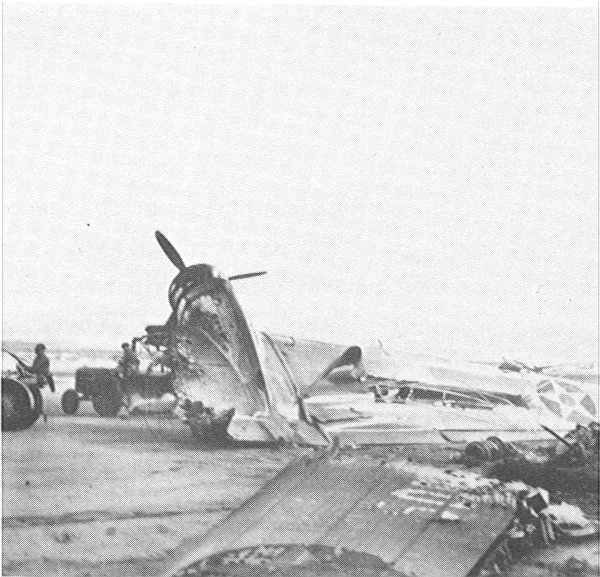
Wreckage on the Hickam flight line.
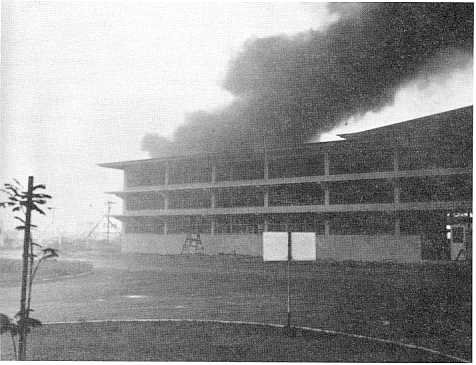
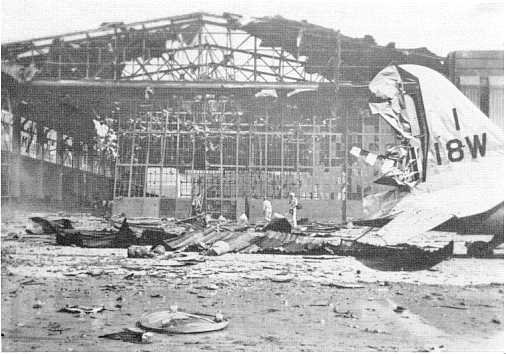
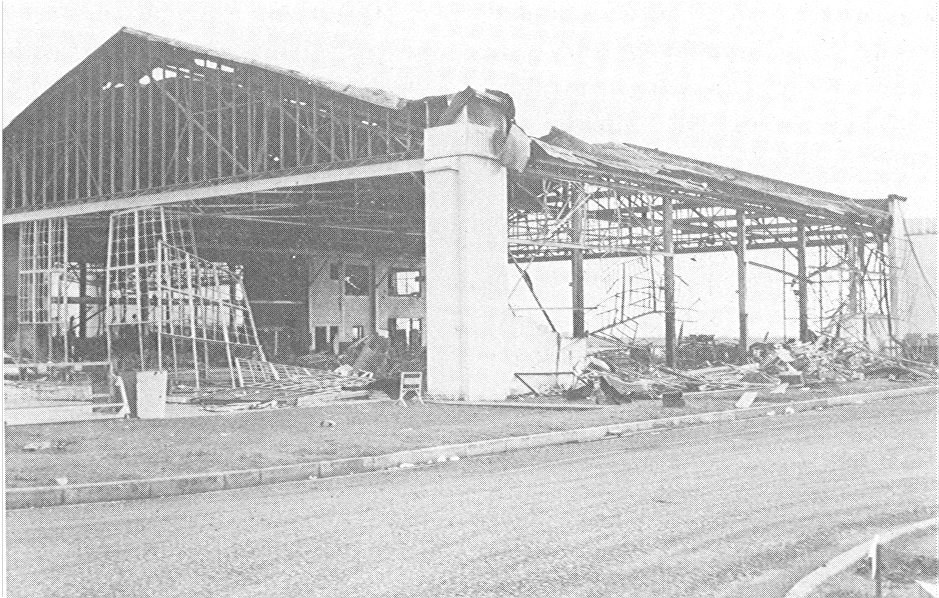
Above, smoke pouring from Hickam Field's Hawaiian Air Depot shops, which were struck by attacking Japanese planes. Below, rear view of wrecked Hangar 11, with B-18 of the 18th Bombardment Wing on the right. The two men near the hangar are Capt Roland D.Boyer of the Signal Corps and Pvt Elliott C. Mitchell, Jr., SOth Reconnaissance Squadron.
This was taken just as a Japanese plane swooped down, machine-gunning the field. Cpl
Vincent P. Dargis, another photographer, snapped this picture, then ran for cover. All were
safe.
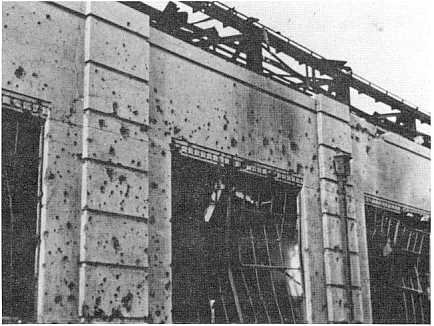
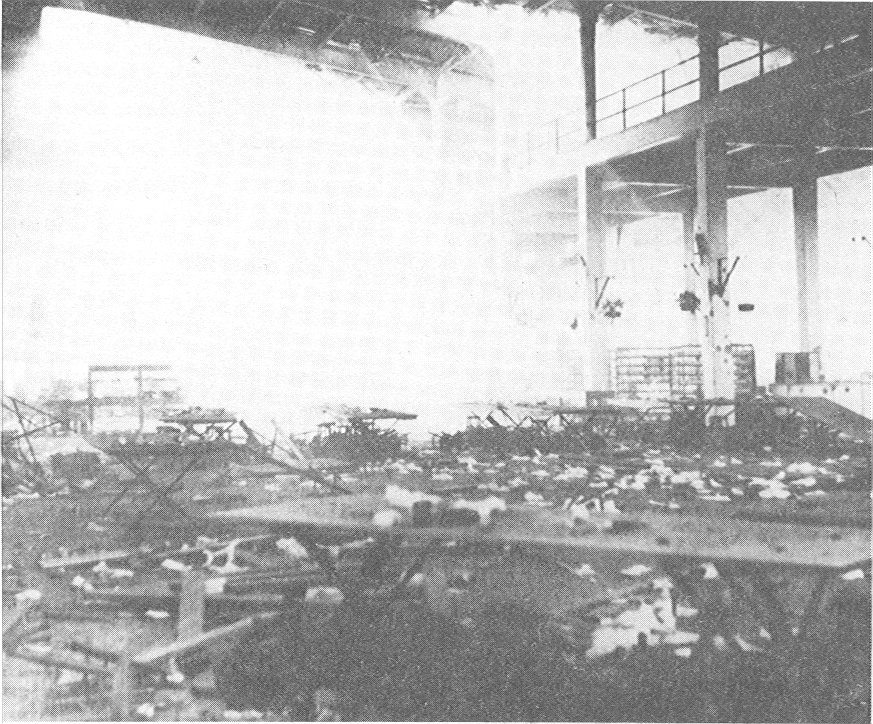
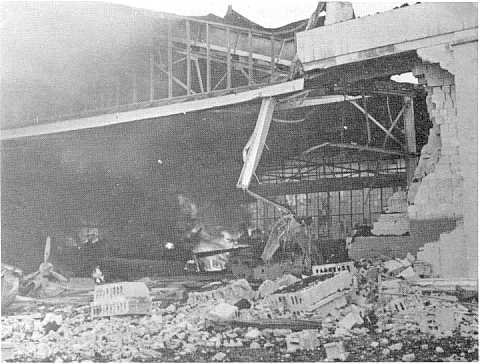
Clockwise from top: Closeup view of bullet-riddled walls and twisted window
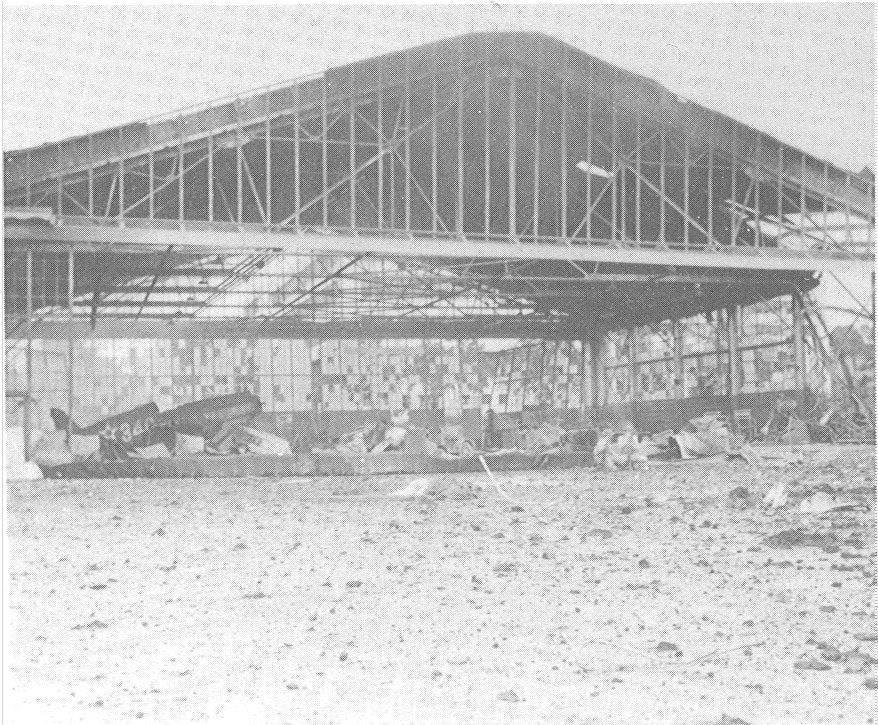
frames of Hangar 11; aircraft wreckage inside Hickam Field hangar, including
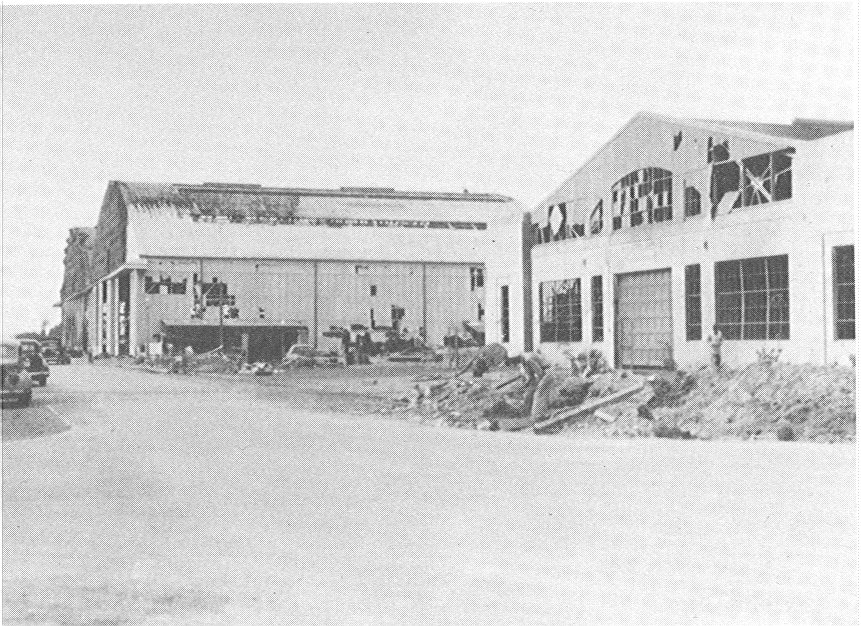
(at left) a B -18 assigned to the 5th Bombardment Group; and Hangar Avenue, looking makai (toward the sea), with Hangar 35 in background.
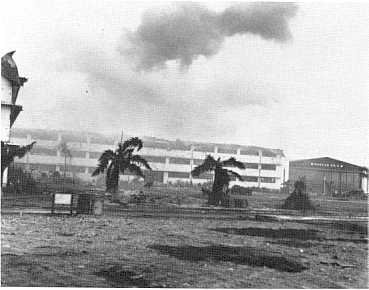
Hickam Field's big barracks, still burning from the Japanese attack, with Hangar 3 visible to the right of Wing D and Wing C at extreme left.
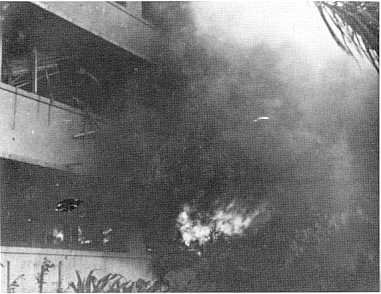
Fiercely burning fires like this one devastated Hickam Field's consolidated barracks.
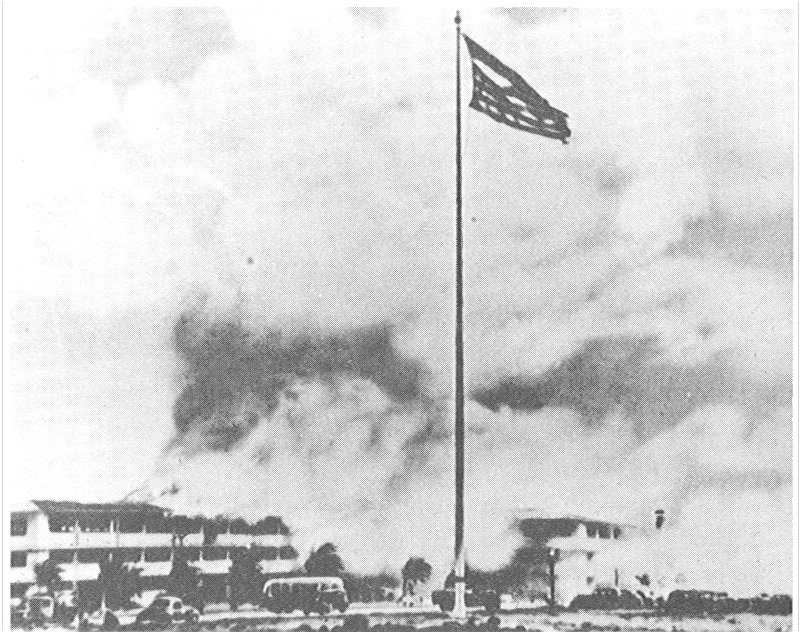
Above, gun emplacement (center) on parade ground at Hickam Field, with the big barracks burning in background. Serving today as headquarters of the Pacific Air Forces, this building has been known since 1948 as the Hale -Makai ("Home by the Sea" in Hawaiian). Below, Old Glory continues to wave over Hickam Field, bearing silent witness to the brutality of the Japanese attack. This same flag later flew above the United Nations
charter meeting in San Francisco, over the Big Three conference at Potsdam, and rippled
above the White House on 14 August 1945 when the Japanese accepted surrender terms.
It was part of a historical display at the Air Force Academy until returned for permanent
display at Hickam Air Force Base in 1980.
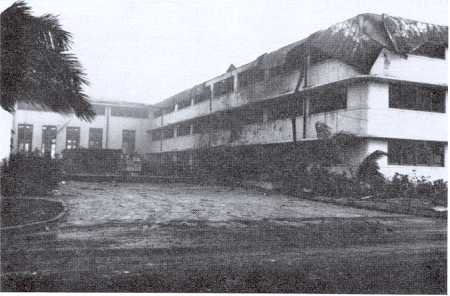
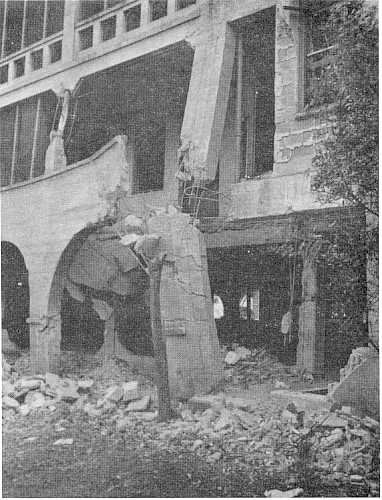
Above, damaged post exchange at Hickam Field, looking from the parade ground and consolidated barracks; and below, complete devastation inside the big barracks at Hickam Field. (Denver D. Gray, US Army Military History Institute)
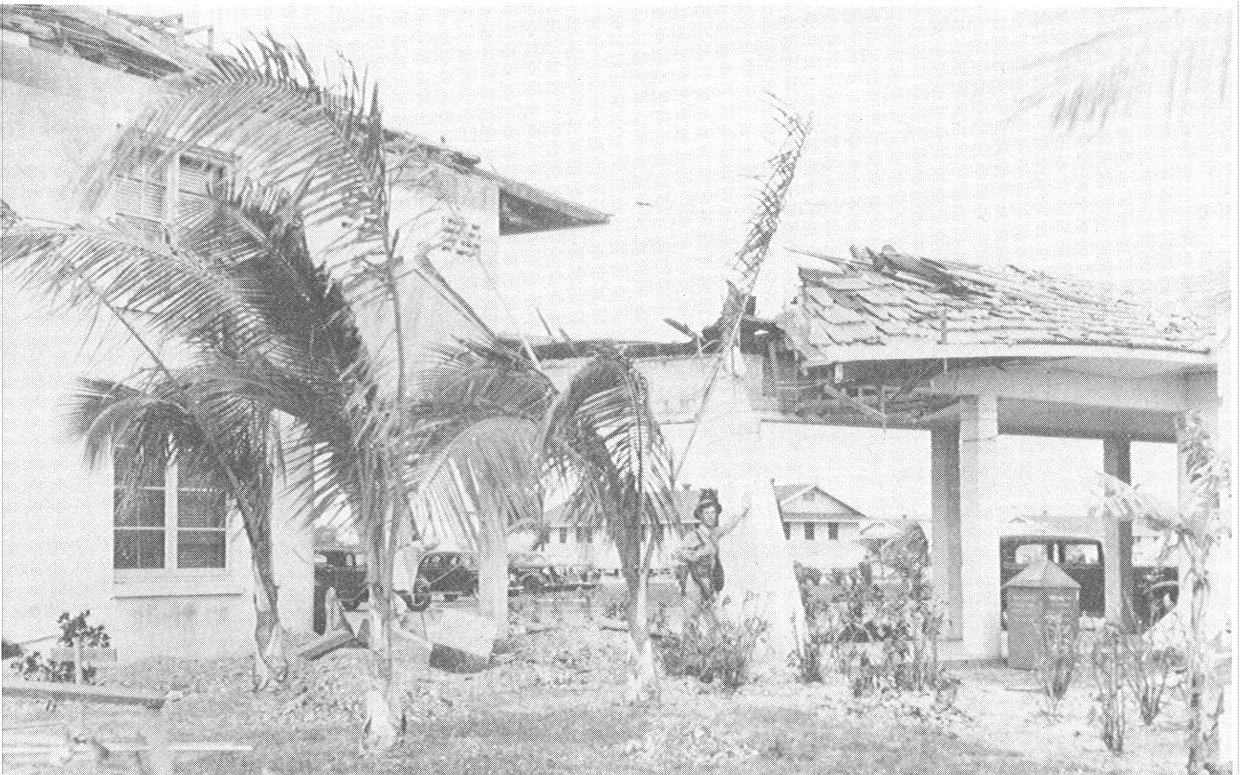
Wing L of Hickam Field's big barracks, with its fire-blackened, bullet-scarred walls and wrecked roof, was devastated by the attack. Mess hall is at left.
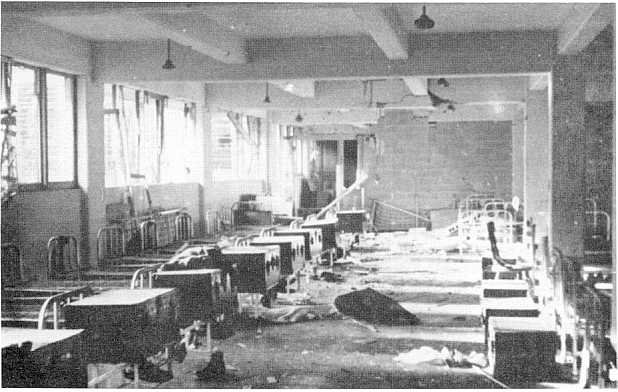
Above, sunlight streams through the splintered mess hall roof where bombs entered, inflicting heavy casualties and leaving the place in a shambles.
Below, wall-to -wall debris covers the floor of the mess hall following the attack. (Denver D. Gray, US Army Military History Institute)
Russell J. Tener (left) and his friend Bill Enos (far right), while on guard duty at this PX warehouse, escaped harm when the building was shattered from the concussion of a bomb which left a crater (partly visible in left foreground) about 20 feet in diameter
and 5 feet deep. (Russell J. Tener)
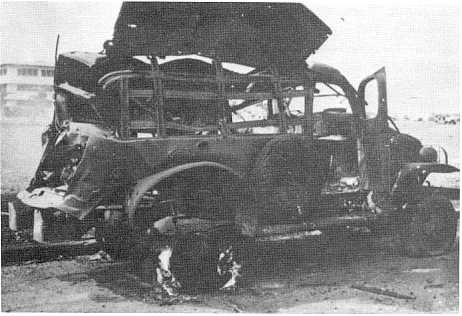
Mangled truck, still burning, parked on F Street next to the parade ground .(today's Headquarters Pacific Air Forces parking lot) .
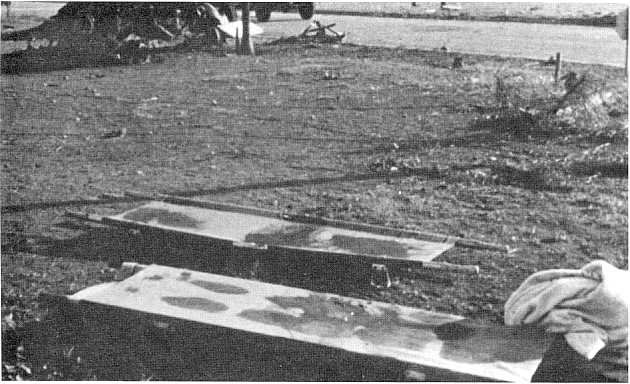
Blood- stained stretchers, awaiting the next load of casualties, grimly attest to the severity of injuries suffered by Army Air Forces personnel at Hickam Field. (Denver D. Gray, US
Army Military History Institute)
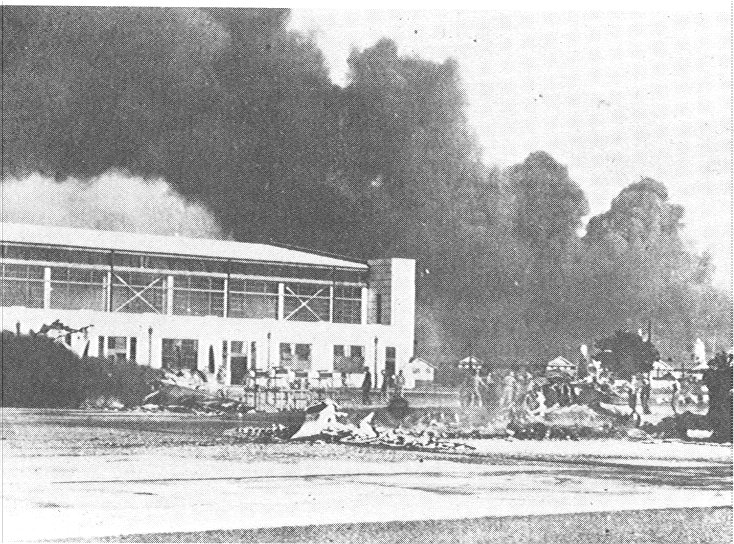
Above, smoke pours from burning aircraft and buildings at Hickam
Field following the Japanese attack. Right, B -18 wreckage on the Hickam flight line. Below,
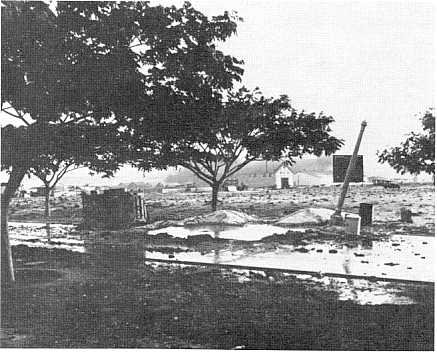
broken water main on 6th Street at Hickam Field with upended car on the left and tilted lamp post on the right.
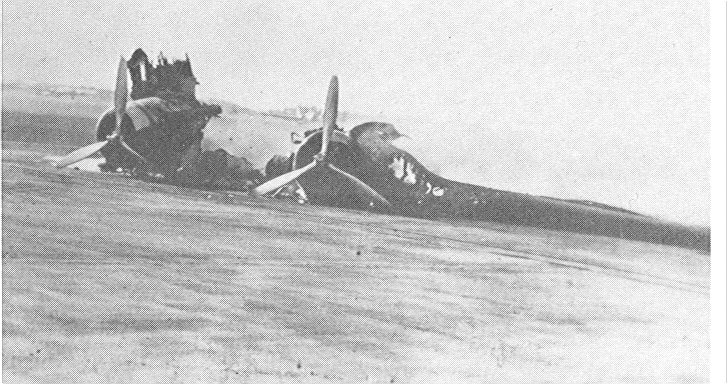
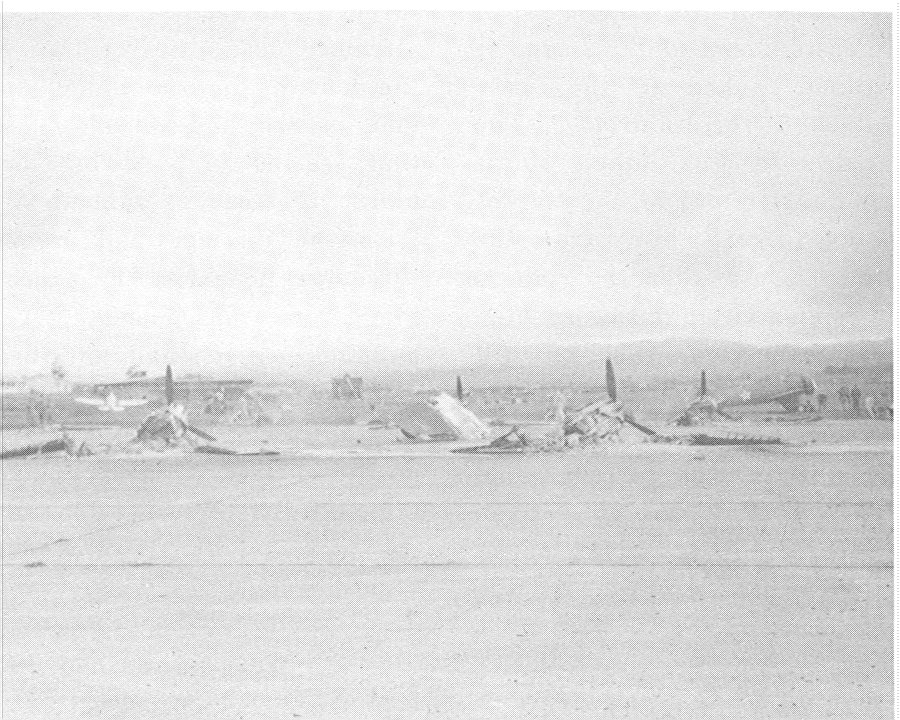
Wrecked planes on Wheeler Field flight line, with Hangar 2 in background and (on the right) tent quarters where many enlisted men were killed.
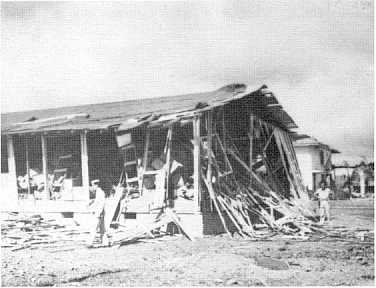
Badly damaged barracks of the 6th Pursuit Squadron, clouds of smoke to billow which suffered heavy casualties. (Joe K. Harding)
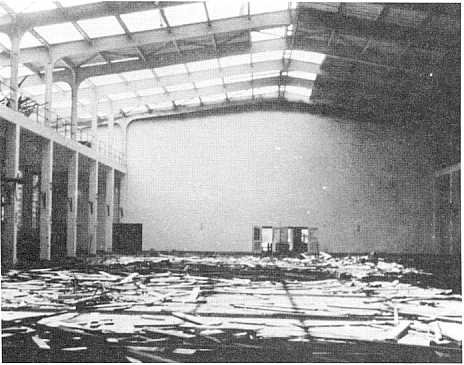
Above, Hangar I, devastated by the Japanese attack, with block dividing wall visible on left. This saved many of the base engineering shops from destruction.
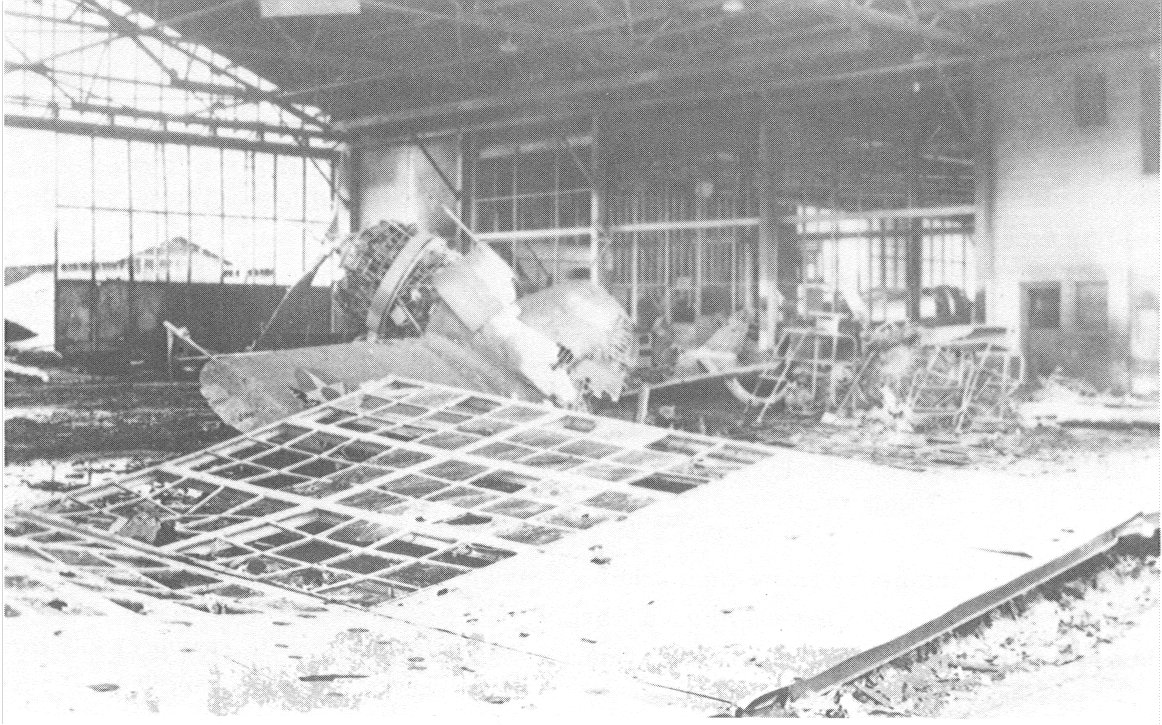
Below, A severely damaged P-36 sits in the rubble of Hangar 1 at Wheeler.
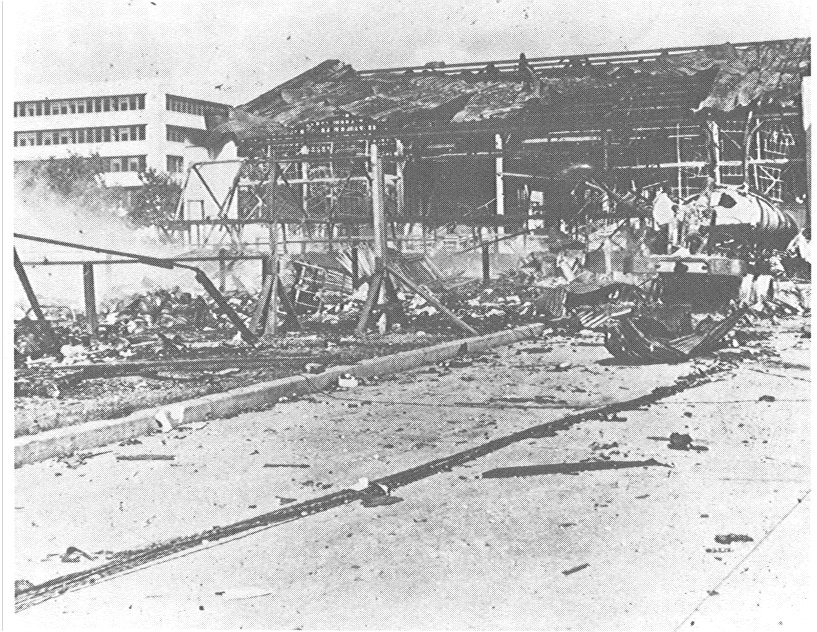
Above, the roar of flames in Hangar 3 was punctuated by firecracker-Iike explosions from the great quantity of ammunition stored there; and below is another view of blazing fires in the twisted remains of Hangar 3 at Wheeler Field. (Joe K. Harding)
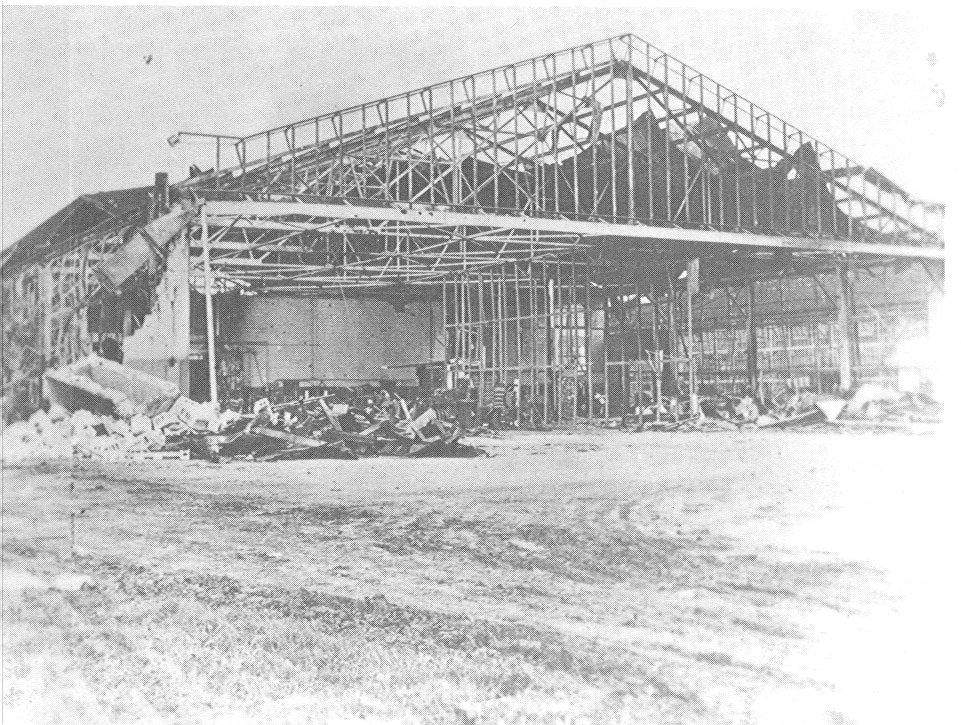
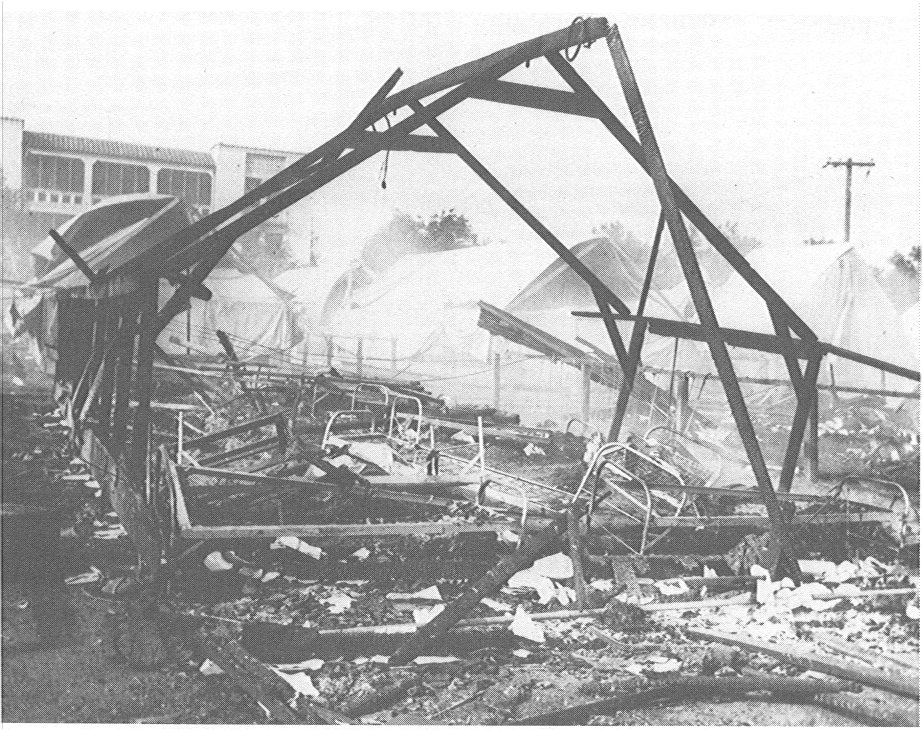
When the flames died down and the smoke cleared, all that remained was the skeleton of Hanger 3. Below, total devastation in Hanger 3.
Many enlisted members of the 72d Pursuit Squadron were killed or seriously injured in these tent quarters along Wheeler's hangar line.
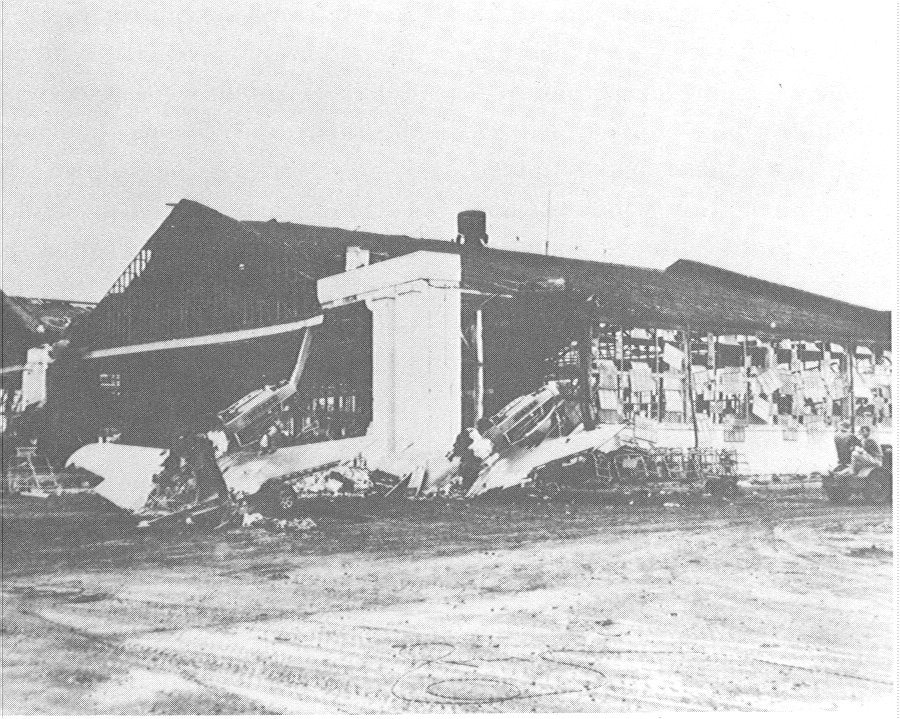
Hangar row at Wheeler Field, with Hangar 3 on the right and the burnt remains or tents which were hit hard by the attacking Japanese.
Above, all that remained of the lineup of p- 40s on the Wheeler flight line.
Below, wrecked P-40Bs sit in front of an equally wrecked Hangar 3 at Wheeler Field.
Riddled by machine. gun fire, this was one of 12 P- 40s assigned to Wheeler's 44th Pursuit Squadron but deployed to Bellows Field for gunnery training at the time of the attack.
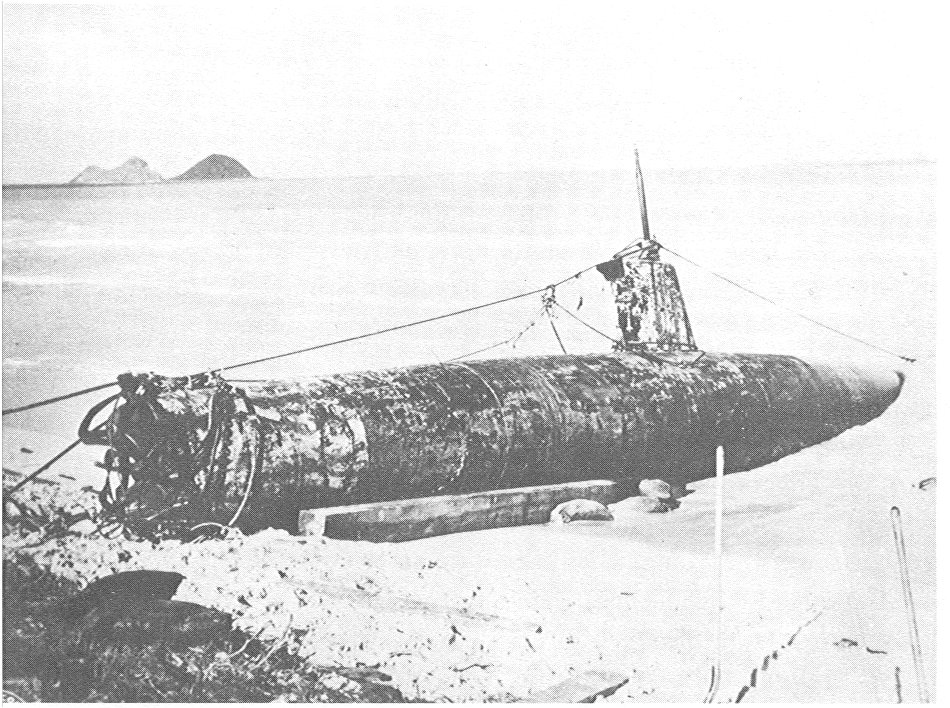
Closeup view of the Japanese midget sub which was dragged to shore by a huge bulldozer at Bellows. Among the articles found in the sub were dried fish, apples, canned goods, American pencils, and one bottle labeled "Wilkens family ."
Main Index
Japan main page
Japanese-American Internment Camps index page
Japan and World War II index page
|
|